Jump to content


Photo

3D Grass Tutorial


116 replies to this topic

#101 Stingreye

Stingreye

    Advanced Member

  • Members
  • PipPipPip
  • 341 posts
  • LocationSouthern California

Posted 28 September 2019 - 08:12 PM

What is the best option for handling bulkheads?  The edge of spline didn't show through the bulkhead until I put the grass on it.


Thanks in advance for any help.


i-L2qxkKw-X3.jpg

I really like the pot bunker method for those areas, then that rough spline will end with the put bunker there


#102 jspirate

jspirate

    Advanced Member

  • Members
  • PipPipPip
  • 487 posts

Posted 28 September 2019 - 08:29 PM

I really like the pot bunker method for those areas, then that rough spline will end with the put bunker there

I agree and if I had it to do over I would have used the pot bunker method.  That said, adding a pot bunker now isn't the easy solution I was hoping for lol


I am guessing there is a way to edit the mesh so that the hanging edge isn't hanging.  Gonna have to learn more of blender I guess...


i7-8700K
GIGABYTE Z390 AORUS Pro
64 GB DDR4 3200
MSI GeForce GTX 1080 Ti Gaming X
LG 32GK850G
Win 10 Home Premium on 1TB SSD


Courses:

Bradford Links - released

Ironwood - released

Cypress Landing - released (also available in a 3DG version)

Crow's Nest - released


#103 Stingreye

Stingreye

    Advanced Member

  • Members
  • PipPipPip
  • 341 posts
  • LocationSouthern California

Posted 28 September 2019 - 08:47 PM

I agree and if I had it to do over I would have used the pot bunker method. That said, adding a pot bunker now isn't the easy solution I was hoping for lol

I am guessing there is a way to edit the mesh so that the hanging edge isn't hanging. Gonna have to learn more of blender I guess...


Is this one where you locked the spline and edited the terrain/water? If so, yes that’s challenging and maybe editing in blender might be easier.

#104 jspirate

jspirate

    Advanced Member

  • Members
  • PipPipPip
  • 487 posts

Posted 28 September 2019 - 08:51 PM

Is this one where you locked the spline and edited the terrain/water? If so, yes that’s challenging and maybe editing in blender might be easier.


Unfortunately, yes :facepalm:


i7-8700K
GIGABYTE Z390 AORUS Pro
64 GB DDR4 3200
MSI GeForce GTX 1080 Ti Gaming X
LG 32GK850G
Win 10 Home Premium on 1TB SSD


Courses:

Bradford Links - released

Ironwood - released

Cypress Landing - released (also available in a 3DG version)

Crow's Nest - released


#105 DPRoberts

DPRoberts

    Advanced Member

  • Members
  • PipPipPip
  • 1,610 posts

Posted 28 September 2019 - 08:52 PM

Update on previous - he says it's alternating between 2 textures and it's fixed in his second version of the shader. Which of course, we can't use because it doesn't work on Unity 5_2_3.

For your bulkhead issue, the blend in the outer rough may not show when it's CF spline only without grass. If you turn on "Shaded wireframe" view, you will see your mesh sticking through the rocks.

2 options for fixes - reload your pre lowered terrain, and

#1 - move your spline points in and recalculate your mesh. Watch in wireframe view

#2 - remove or decrease your blend in the rough and recalculate your mesh. You may want to create a rough specific for bulkheads if you want a blend maintained on your other areas of the course.

The point is that the outer mesh usually extends beyond what you "see" because the blend has alpha cutoff in it and you don't visualize the entire texture. Floating in air like that, you may not see it but it's there.

#106 jspirate

jspirate

    Advanced Member

  • Members
  • PipPipPip
  • 487 posts

Posted 28 September 2019 - 09:27 PM

Update on previous - he says it's alternating between 2 textures and it's fixed in his second version of the shader. Which of course, we can't use because it doesn't work on Unity 5_2_3.

For your bulkhead issue, the blend in the outer rough may not show when it's CF spline only without grass. If you turn on "Shaded wireframe" view, you will see your mesh sticking through the rocks.

2 options for fixes - reload your pre lowered terrain, and

#1 - move your spline points in and recalculate your mesh. Watch in wireframe view

#2 - remove or decrease your blend in the rough and recalculate your mesh. You may want to create a rough specific for bulkheads if you want a blend maintained on your other areas of the course.

The point is that the outer mesh usually extends beyond what you "see" because the blend has alpha cutoff in it and you don't visualize the entire texture. Floating in air like that, you may not see it but it's there.


There would be other fixes is I reload the pre-lowered terrain, so I am not willing to consider that at this point.  Thanks for the feedback though.  It looks like there will be 17/18 holes with 3DG lol


Ahhh well, its a par 3 and the tee box is also a bulkhead, so only those that miss their snap horribly will ever notice it haha


EDIT:  wait sec... maybe I could duplicate project and get the fbx from the dup project and use that in production version?   Need to think about that some...


i7-8700K
GIGABYTE Z390 AORUS Pro
64 GB DDR4 3200
MSI GeForce GTX 1080 Ti Gaming X
LG 32GK850G
Win 10 Home Premium on 1TB SSD


Courses:

Bradford Links - released

Ironwood - released

Cypress Landing - released (also available in a 3DG version)

Crow's Nest - released


#107 NoPutt

NoPutt

    Advanced Member

  • Members
  • PipPipPip
  • 2,902 posts
  • LocationSouth Carolina

Posted 29 September 2019 - 09:17 AM

You could export the wall and mesh into blender and 

knife cut the mesh along the wall and then delete the offending faces,

save mesh as .fbx and back into Unity. 

K5UrBop.jpg


  • DPRoberts and jspirate like this

Dry Gulch...................Released                     Smithfield Golf Club...........Released

Millstone Golf Club....Released                      The Walker Course............Released

Kingsmill Woods Course...Released               Pine Lake Golf Club..........Released

Woodhaven Golf Club (9) Released                The Reserve at Keowee...Released

Cliffs at Keowee Vineyards..Released              The Ace Club...................Released

Dry Gulch 2..........Released                               Blackberry Oaks.............Released


#108 jspirate

jspirate

    Advanced Member

  • Members
  • PipPipPip
  • 487 posts

Posted 29 September 2019 - 11:59 AM

You could export the wall and mesh into blender and 

knife cut the mesh along the wall and then delete the offending faces,

save mesh as .fbx and back into Unity. 

K5UrBop.jpg


Thanks NoPutt. I like the way this sounds.

I am a complete and total noob to blender, but I like to learn so I am off to research knife cutting!


i7-8700K
GIGABYTE Z390 AORUS Pro
64 GB DDR4 3200
MSI GeForce GTX 1080 Ti Gaming X
LG 32GK850G
Win 10 Home Premium on 1TB SSD


Courses:

Bradford Links - released

Ironwood - released

Cypress Landing - released (also available in a 3DG version)

Crow's Nest - released


#109 jspirate

jspirate

    Advanced Member

  • Members
  • PipPipPip
  • 487 posts

Posted 29 September 2019 - 11:06 PM

You could export the wall and mesh into blender and 

knife cut the mesh along the wall and then delete the offending faces,

save mesh as .fbx and back into Unity. 


Thank you Mr. NoPutt!


I took the Blender dive and pulled this off.  Don't get me wrong, I screwed up a bunch of crap along the way.  I mean its a freaking mess... I deleted faces, left behind indices and who knows what else.  The coordinated were all borked so I ended up hand-placing the mesh and tweaking its coordinates in the inspector to get a position that is almost acceptable.  What a total and complete mess and yet I am still feeling kinda good about it lol


I just hope I don't find blades of grass sticking up on those missed indices somewhere else on the course!


i-xmKszJ9-X3.jpg


  • Buck, RobC and NoPutt like this

i7-8700K
GIGABYTE Z390 AORUS Pro
64 GB DDR4 3200
MSI GeForce GTX 1080 Ti Gaming X
LG 32GK850G
Win 10 Home Premium on 1TB SSD


Courses:

Bradford Links - released

Ironwood - released

Cypress Landing - released (also available in a 3DG version)

Crow's Nest - released


#110 slewin

slewin

    Advanced Member

  • Members
  • PipPipPip
  • 400 posts

Posted 04 November 2019 - 07:17 AM

OK,
I'm doing something wrong.
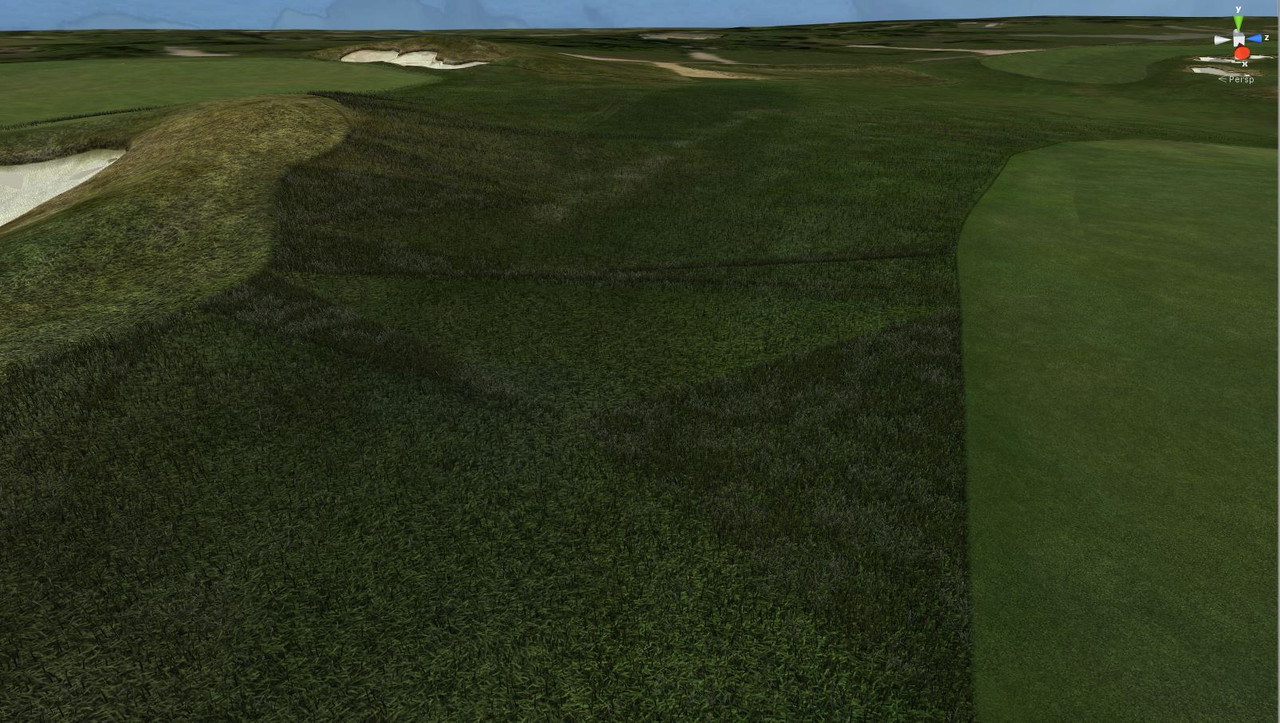
Seems the grass is thicker around the edge where the tris are
Any ideas.....

MGC-01.jpg


  • DPRoberts likes this

#111 DPRoberts

DPRoberts

    Advanced Member

  • Members
  • PipPipPip
  • 1,610 posts

Posted 04 November 2019 - 11:33 AM

The shader plants grass based on the number of vertices in the mesh. Areas around bunkers and edges have a greater number of vertices so you see more triangles.

Ways to overcome this/improve the look -
1. Reduce mesh grid fill with CF layers or
2. Subdivide the mesh in 3d program or
3. Retopologize

It's my least favorite issue with the shader and has no easy fix. I'm using Quadremesher in Blender and it's really super easy to get the results I want and adds less than a minute work per mesh.

#112 slewin

slewin

    Advanced Member

  • Members
  • PipPipPip
  • 400 posts

Posted 04 November 2019 - 02:13 PM

Thanks DP
I’ll get on it.
Unfortunately all the bunkers etc are very hi res to get the detailed edges.

#113 bortimus

bortimus

    Advanced Member

  • Members
  • PipPipPip
  • 1,234 posts

Posted 30 November 2019 - 12:47 AM

Hey DP, the tutorials are excellent and I am in the process of converting courses to 3D grass.

This may be a dumb question... but why does it make a difference when selecting meshes for export to get them as close to 63,000-ish tris when the OBJ exporter does this on its own? Assuming that we want to use the same material on all of the meshes. I can understand why you need to separate those meshes if using different materials.

Suppose there are 240,000 tris of mesh. The best I can do is to manually divide these most efficiently into 4 meshes with one UV each right?

But if I were to just select them all and export them wouldn’t they automatically be divided into 4 meshes with one UV each?

I could be overlooking something simple here and admittedly I don’t know much about the inner workings of Unity. Maybe you can clarify this.

Thanks for all your time and effort putting these tutorials together.
  • DPRoberts likes this

#114 DPRoberts

DPRoberts

    Advanced Member

  • Members
  • PipPipPip
  • 1,610 posts

Posted 30 November 2019 - 01:27 AM

Bortimus,

As always, I present some ideas early on to try and get others in developing along with me. I have changed the way I do it now and would recommend it.

Most importantly, just export each mesh separately that you are converting to the grass. It's so much easier if you have to make corrections.

I initially was advocating bulk export out of fear that people wouldn't do it because of too many steps.

Just stay organized. I make a folder called Splines and then subfolders Hole 1, Hole 2, etc... I usually export a rough and semi rough for each hole. But, you may also have longer grass around bunkers as well.

If you did your larger tri export, on reimport, Unity breaks up the meshes in a strange fashion. This means you will end up seeing at least 4 different meshes for 200+ tri count and therefore 4 materials of the grass in your view at all times. It can look like a checkerboard on how the meshes are randomly sub divided. Even if they are the same material, it bogs down the FPS.

If you manually divide it, you can do that. Heck, you could export the whole course. My goal is that with viewable grass you are typically only visualizing 2 grass meshes at any one time.

I hope that makes sense. If you are interested in retopologize with Quadremesher DM me. It really looks much cleaner and is pretty darn easy. It adds less than 30 seconds to the workflow and gets rid of grass triangles around the bunkers and along semi rough edges.
  • bortimus likes this

#115 DPRoberts

DPRoberts

    Advanced Member

  • Members
  • PipPipPip
  • 1,610 posts

Posted 30 November 2019 - 01:31 AM

The 65535 tri limit on meshes has to do with max number of 16 bit object in Unity environment.

#116 DPRoberts

DPRoberts

    Advanced Member

  • Members
  • PipPipPip
  • 1,610 posts

Posted 30 November 2019 - 01:37 AM

I was also trying to up the tri count per mesh because the grass shader plants density based on number of vertices.

Now, with Quadremesher, you can leave grid fill in CF close to stock. Then, in Blender, you can get the greater tri count so that you'll have nicely, even density of grass planting when using the shader.

#117 bortimus

bortimus

    Advanced Member

  • Members
  • PipPipPip
  • 1,234 posts

Posted 30 November 2019 - 02:02 AM

Ok that makes sense.  I appreciate the clarification.

I think I’ll start doing hole by hole exports as well.  I’ll PM you sometime about the retopologize process.  Would be nice to get rid of those grass triangles.


BTW one little thing I like to do since I prefer to have some kind of blend around the bunkers, semi-rough and tees but also have the grass go all the way up to their edges is to toggle their blends off, build the splines, export the mesh so the grass goes all the way up to the edges, then toggle their blends back on and rebuild the splines.  Then the 3D grass stays grown over the blends all the up to the edges which I kind of like in some cases.  

Nothing groundbreaking but helps get the look I wanted.


  • RobC likes this


Reply to this topic


0 user(s) are reading this topic

0 members, 0 guests, 0 anonymous users