Jump to content


Photo

Driving Distance and Course Design


  • Please log in to reply
45 replies to this topic

#1 Adam T1

Adam T1

    Advanced Member

  • Members
  • PipPipPip
  • 106 posts

Posted 30 April 2014 - 01:30 AM

Hey all, I'm very close to starting a course in Unity. I have a few nice designs that I have drawn out on paper in the past (replete with 3D versions trapped inside my brain) but am reluctant to do so until we know how far we will be hitting the ball. Are there different characters to choose from? Is there a way to tailor a character to certain distance/ballflight traits?

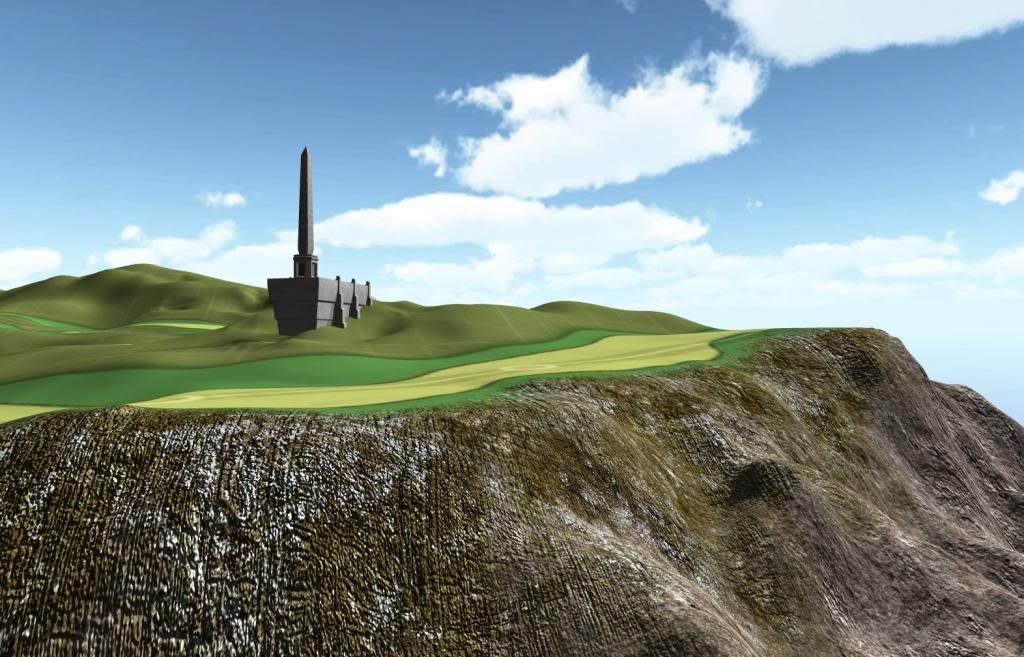
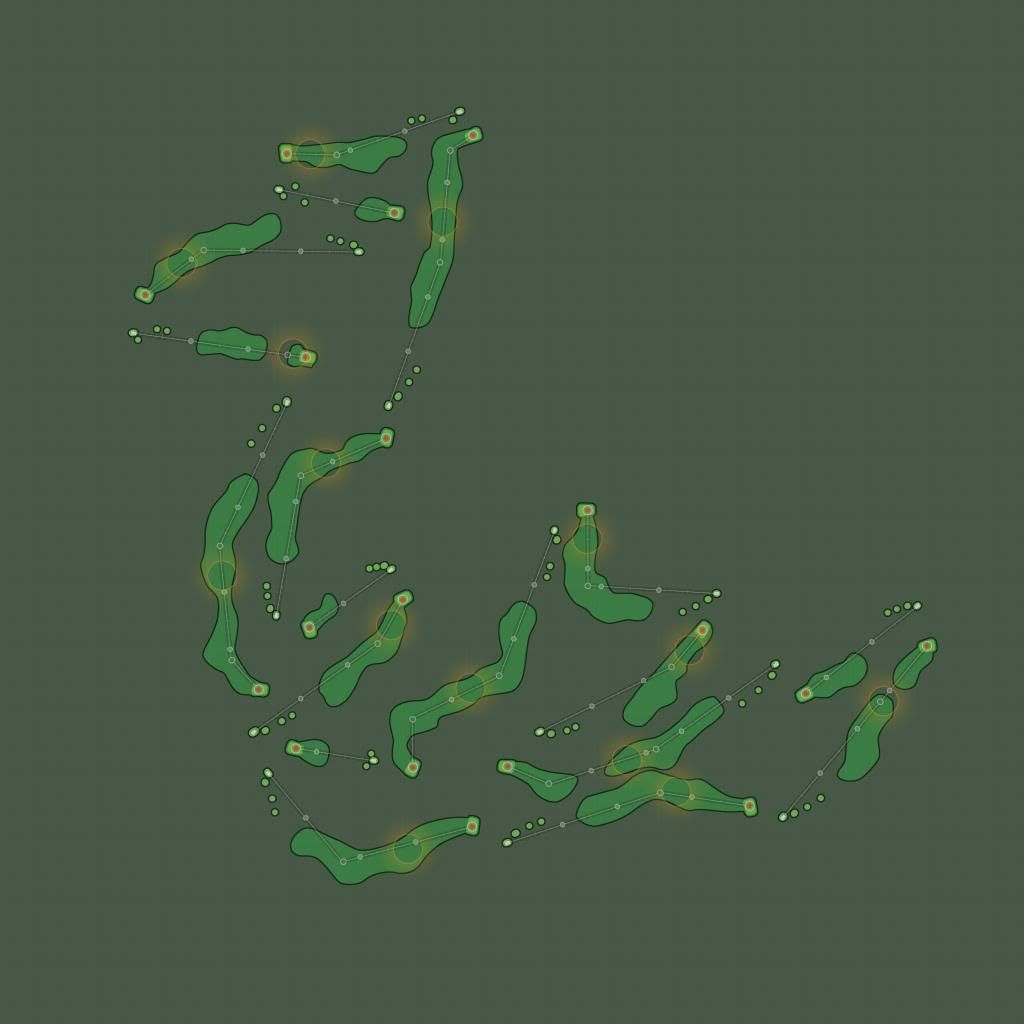
This question belongs as much in the other categories as it does here, but it pertains specifically to course design. Many of the courses I have drafted are set to play to my personal drive avg of around 250-260yds from the back tees. In a game environment, drives tend to be much longer than this. Since I tailor my designs strategically based on drive distance for different tees, I would want to adjust them to match how far we will be hitting the ball in game. That said, do any of the dev team members have an idea as to what distance range/s I should expect? That information would be greatly appreciated.

The last part is more of an in-game question. Would it be possible to, for instance, if a player is playing a shorter set of tees (if even possible) to decrease shot distances or perhaps disable driver to maintain risk/reward strategy as designed? I would not force people to do this as it can be a blast to bomb the ball around a short course, but for those who are looking for a more personal, more realistic experience, is this possible?


#2 IanD

IanD

    Advanced Member

  • Members
  • PipPipPip
  • 3,371 posts

Posted 30 April 2014 - 04:46 AM

One way of thinking that I'm currently trying to work in, is with the ability to move my tee area, should that need arise.


Naturally it may hinder certain other elements you plan to introduce, such as slope etc, but it may help you begin the layout process. The learning curve of Unity is best understood sooner rather than later in my opinion..


#3 Adam T1

Adam T1

    Advanced Member

  • Members
  • PipPipPip
  • 106 posts

Posted 30 April 2014 - 06:23 AM

Agreed, as I learned the hard way tonight. It will take a very long time to become proficient with the basic terrain painting tools, maybe tomorrow brings more luck. I already have a few decent quality layouts on hand, it's just a matter of going from brain to screen.


Good point on moving the tee area. I still see the hitting distance as something worth knowing if available, but the modifications to slopes, hazard placement, teeing areas, and fairway shapes are all relatively minor.


#4 Kablammo11

Kablammo11

    Obscure Person

  • Members
  • PipPipPip
  • 3,953 posts

Posted 30 April 2014 - 06:58 AM

Here's one possible clue: We know for a fact that the makers want to create a realistic golf game - and that implies that driving distances will be realistic as well - and that means that, from the back tees at pro level, a ball hit with a driver will travel around 260yds in the air at zero wind and elevation.

Unity uses the metric system, btw, so you would need to translate their values into yards.

I have placed my aim and shot points on par 4s and 5s at somewhere between 230 and 270 yds, depending on the length and the intended "dogleginess" of the hole. As Ian suggested, I might need to move the tees a bit once I will be able to test-play the course, in order to fine-tune the tee shot experience.


In a nutshell: Simply create a course based on distances that should work in real life - and you won't be too far off in the game. 


  • BLINDT likes this

>>>>>>> Ka-Boom!


• Mulligan Municipal • Willow Heath • Pommeroy • Karen • Five Sisters • Xaxnax Borealis • Aroha • Prison Puttˆ

• The Upchuck   The Shogun  • Black Swan (•)


<<<<<


#5 Adam T1

Adam T1

    Advanced Member

  • Members
  • PipPipPip
  • 106 posts

Posted 30 April 2014 - 04:35 PM

Ok, sounds good! I'll keep those points in mind. I would ask about measuring distances in Unity, but there's a whole thread on that I should check out first. So far I was just using the large boxes off to the side of the terrain as guidelines, assuming they're each 100m.


Here's to hoping another day brings less moundy looking terrain! I can see why Mike Jones used a flat hole in his course forge demo video now  :lol:


#6 Jimbobh

Jimbobh

    Advanced Member

  • Members
  • PipPipPip
  • 539 posts
  • LocationMaine

Posted 01 May 2014 - 12:08 AM

I stumbled across this ruler Free in the unity asset store.

http://u3d.as/conten...ne/zz-ruler/1Av

It is in meters but might be of some use.


Gigabyte ga-z68x-ud3h-b3 Motherboard

Intel Core i5-2400 CPU@3.1GHz 3.70GHz

GeForce GTX 1050 Ti
16GB Ram   (2)G.Skill Ripjaws F3-10666L9S-8GBXL
Windows 7 Home Premium


#7 Adam T1

Adam T1

    Advanced Member

  • Members
  • PipPipPip
  • 106 posts

Posted 03 May 2014 - 05:39 PM

I have some very bare bones work done for the 7th hole. I started with the 6th but being an absolute Unity novice at the time it still needs a couple hours to make the terrain look at all decent. Can't go on to the 8th until I pick up my paper drawing of the layout at this point to get some shapes and distances right.


Unity's texture painting seems to be extremely cumbersome! I'm also very slow with the elevation tools but that will hopefully change a bit over time. Anyway onto the 7th hole. My original sketch has this being a 433 yard dogleg right par 4 with a semi-lay up tee shot, probably a 3 wood. It drops off pretty sharply to the lower fairway and green area, a bit of a vertigo hole but not supposed to be extreme. Eight is supposed to be a reachable par 5 with wetlands along the right side of the fairway. Tee shot is from an island in the marsh with the green back across the hazard.


Hole7TeeBeginCons_zpscc915cd9.jpg


The view from the 7th tee. Supposed to be bordering on semi blind, with the fairway not visible until just short of the landing area. To accomodate the driver distance I'm probably bumping this hole back to around 450-460yds. The terrain shaping here actually looks somewhat decent! There will eventually be many conifers and deciduous trees off to the sides but that comes later. The 8th fairway back there eventually will not be visible: it will be lower and likely separated by some trees.


Hole7ApproachBeginCons_zps7675d920.jpg


The approach to the 7th green. Yes, the textures suck, the green is pancake flat for the time being, it's stuck in a bowl for now, there may or may not be a front left bunker, and there's no marshland surround loosely guarding the back left of the green, but until I get to holes 5 and 8 this is basically how it will look...


#8 IanD

IanD

    Advanced Member

  • Members
  • PipPipPip
  • 3,371 posts

Posted 03 May 2014 - 06:20 PM

Adam... you're doing a fine job of using the program and you'll find things become easier over time. Maybe now isn't the time to worry too much about several holes and simply complete a hole. Although you do seem fully capable of being able to compete with several holes at a time, there are many areas of Unity to tackle. Your pancake green texture is certainly one area that will need addressing soon too.


Maybe, whilst playing with the elevations, play with some textures to see how they suit each other. You'll need a good family of textures that suit those outer areas too, the areas that golfers won't likely go, but may from time to time. I know the CF will arrive with default textures, but you're understanding of them could greatly improve now too.


These are but very minor critiques of the work you are achieving though, and you should be commended for the time you are putting in. It isn't easy learning Unity at the beginning, but once you do get into the art of painting terrain and sculpting it, you'll find you can create anything... good luck !


#9 Adam T1

Adam T1

    Advanced Member

  • Members
  • PipPipPip
  • 106 posts

Posted 03 May 2014 - 09:09 PM

The green texture is pretty ridiculous and beyond unrealistic. Actually, all of them are that way at the moment...I know people talked about using photoshop to change texture colors, and I saw the basic "details" stuff on those basic tutorial videos...would have to watch some of them again. I haven't experimented with prefabs at all yet, so lots left to cover...but trying to work on this at the same time as school, fitness, and extracurricular GIS courses...the time will come soon but maybe not soon enough. 

Meanwhile, any good suggestions for learning textures? Any particular videos? The detail grass from the heightmap vimeo series looked really tall but can you get that down to appropriate golf course height just by tweaking a few basic settings?


#10 IanD

IanD

    Advanced Member

  • Members
  • PipPipPip
  • 3,371 posts

Posted 04 May 2014 - 05:11 AM

Again, it's sometimes relearning things you may already know, but overlooked how you can use something simple and understandable, and create something you find workable and pleasing. Your life is naturally busy and a likely blur at the moment... you sure you wanna learn this instead of getting out there with girls and sports...? Hell, even I've nearly stopped typing and nearly gone... til I realised how old I was and thought "I can't keep up with the ball, let alone girls..."


Anyway... UDemy's free video course is a great starter for understanding Normal Maps with textures, to enhance the depth of your textures. When adding textures, you're likely wondering what the second box is for, so this gives you a good understanding of how it enhances textures.


Watch it Free Here -

Unity3d Environmental Series

#11 Kablammo11

Kablammo11

    Obscure Person

  • Members
  • PipPipPip
  • 3,953 posts

Posted 04 May 2014 - 08:55 AM

Don't let the fairway, green, tee textures get you down, Adam T1. That's what the CourseForge will take care of later.

It's absolutely impossible, even given massive time, infinite knowledge and endless patience, to get them to look realistic with Unity alone. 


At this early stage, you need to get comfortgable with the Unity terrain engine and all its features - and use this learning process to shape and sculpt your plot into a landscape that is ready for the Forge.


>>>>>>> Ka-Boom!


• Mulligan Municipal • Willow Heath • Pommeroy • Karen • Five Sisters • Xaxnax Borealis • Aroha • Prison Puttˆ

• The Upchuck   The Shogun  • Black Swan (•)


<<<<<


#12 Adam T1

Adam T1

    Advanced Member

  • Members
  • PipPipPip
  • 106 posts

Posted 04 May 2014 - 07:45 PM

Ok, so you think I should keep chugging along with the terrain for now? My initial thinking is that eventually I could fine tune the CF textures to my liking but at least get by with them at first. I do want to get into planting and stuff, especially because the next couple holes require me to spend long hours "digging." A question about that: what opacity do you find best for that, and how aggressive or conservative should I be with that? If it looks a bit like a mess at first, is it less time consuming to fix it than it is to go slowly and spend less time at the end? I had been using mainly opacity 2 with brush size from 40-100, which takes quite a bit of time for the amount of earth I'm "moving."


Ian, I will keep learning more about Unity as necessary and when the time is available. Might be best to stick with the "busywork" for now aka digging out the terrain for holes 8 and 9. The schoolwork will have to be finished if quality sleep is to be had... Planting trees and dealing with high grasses will probably be more important in the relative long-term than getting the perfect grass textures. It would look a lot better now but my course would never be finished. Heck, I might still decide I hate it and quit halfway through, hope not!


Also, I'm trying out one of the courses I'm thinking of making a virtual version of. There are quite a few Joe Lee and Arthur Hills courses in my area, so lots to choose from :D


#13 Kablammo11

Kablammo11

    Obscure Person

  • Members
  • PipPipPip
  • 3,953 posts

Posted 05 May 2014 - 05:45 AM

There are no rules for which opacity (and which brush type) works best for what. As in most design tasks, I tend to start with a rough job at max settings, then going into detail work to refine specific areas a bit more. 

Digging up and carving out an entire golf course plot with terrain tools alone is a rather time-consuming and messy affair. May I suggest you produce a height map first? 


For lack of alternatives, here's the height map of my project, Willow Heath:


WH-HM2049_zps403a7bd7.jpg


Just for giggles, click on the picture, open it in a new window, then click on the little "enlarge" lupes to get to its original size in Photobucket. Download that and then use your graphics software to transform the .jpg into a .raw format (needs to by grayscale). Import into Unity at Terrain Resolution 2049 and with about 240meters height.

You may construct something similar in 2D yourself and import it. Takes one or two hours but will save you lots of time. For major changes to my elevation I usually quickly export the current height map from Unity, edit it in Photoshop and then re-import it again.


>>>>>>> Ka-Boom!


• Mulligan Municipal • Willow Heath • Pommeroy • Karen • Five Sisters • Xaxnax Borealis • Aroha • Prison Puttˆ

• The Upchuck   The Shogun  • Black Swan (•)


<<<<<


#14 Mike Jones

Mike Jones

    Advanced Member

  • Administrators
  • 6,159 posts

Posted 05 May 2014 - 07:45 AM

Nice work Adam!


If I'm making a fictional course from scratch and want it to have big elevation changes I usually start off with a small hightmap maybe 257x257 and as I add more detail I export it change it's size in photoshop or gimp (free) and then reimport it again until I am up to my full course resolution of 2049. I find that this method makes it easier to make big elevation changes earlier on and then gradually refine later.


It's a possibility that we incorporate some form of heightmap resolution changer in CF itself which would simplify the process.


K11 is right, really dont worry too much about the textures as the systems we use for them inside CF are far more advanced than anything that comes with Unity by default.


#15 Adam T1

Adam T1

    Advanced Member

  • Members
  • PipPipPip
  • 106 posts

Posted 05 May 2014 - 04:10 PM

I think you're onto something with using a heightmap, K11. My course was going to be a mix of hills and somewhat flat wetland areas with maybe 50m elevation change from min to max. I like most of what I have at this point in terms of elevation that I have done in Unity, but it would be a long, arduous process to get everything right. So much land lowering would be involved. Is is possible to export what I have into a heightmap or would I have to essentially start over? It's still definitely worth considering even if I'd have to start over; it would be so much faster than continuing this way for the next 15+ holes.


#16 Kablammo11

Kablammo11

    Obscure Person

  • Members
  • PipPipPip
  • 3,953 posts

Posted 05 May 2014 - 04:38 PM

It is possible. Go to terrain settings (the little cog to the very right of the tool bar in the terrain engine), and click "Export Raw" at the bottom of the inspector window that pops up. Open your raw file in Photoshop or Gimp or whatever, go to town on it, export the new file to .raw again, import from the same spot you exported it, done.

One little thing you must know: The heightmap is always vertically inversed to what you remember from your terrain. (Think of it as the terrain elevation pushing up the terrain from below ground level). So I advise you to flip it vertically first, then do all your work, then flip it vertically again before exporting it.


While drawing a height map, everything bright and white will result in a high spot, everything dark and black in a low spot. Any hard difference in brightness will result in an ugly sharp edge on the unity terrain: Like this:

Regioncapture1_zps0f11ef27.png


Yeah, that was my first go at height mapping...  more than a year ago (how time flies..) But even so, working with this crude little thing is a lot more comfortable than having to sculpt a terrain from scratch. Couple of smooth brushes and the jagged steps are history.

It's quite tricky to translate every detail of your 3D imagination into a 2D rendering of shades of gray. But every little helps... (sorry, Tesko). Do understand that even though you have a heightmap, the detail sculpting will still need to be done in Unity - but at least there you will only have to deal with creases, mounds and molehills and won't have to bother with mountain ranges anymore. The height map does most of the heavy lifting and frees you to deal with the details. 


If you want to unilaterally increase the elevation - or reduce it - you can do so by changing the "height" value during import. So don't restrict yourself too much over total height difference. It's always nice to leave yourself a little wiggle room either way.


>>>>>>> Ka-Boom!


• Mulligan Municipal • Willow Heath • Pommeroy • Karen • Five Sisters • Xaxnax Borealis • Aroha • Prison Puttˆ

• The Upchuck   The Shogun  • Black Swan (•)


<<<<<


#17 Adam T1

Adam T1

    Advanced Member

  • Members
  • PipPipPip
  • 106 posts

Posted 06 May 2014 - 03:18 AM

What would make it really easy is overlaying a heightmap on top of my hand drawing of the course. I have photoshop but have never used it, so not sure how that would work. Anyways, trying out what you recommended with the heightmap now. Not gonna do too much because I'm waking up early to play a PB Dye course :D


P.S. do Unity and Adobe CS compete for the same RAM space the way CS and AutoCAD do?


PP.S. Here's what I got. I have no clue what to do with it. Looks like topographical lines for elevation, not the shades of grayscale I was expecting

Heightmap_zps8d1e6c1c.jpg


#18 Kablammo11

Kablammo11

    Obscure Person

  • Members
  • PipPipPip
  • 3,953 posts

Posted 06 May 2014 - 05:33 AM

No idea about RAM competition

Yes, that doesn't look like a useful height map at all. 


>>>>>>> Ka-Boom!


• Mulligan Municipal • Willow Heath • Pommeroy • Karen • Five Sisters • Xaxnax Borealis • Aroha • Prison Puttˆ

• The Upchuck   The Shogun  • Black Swan (•)


<<<<<


#19 Adam T1

Adam T1

    Advanced Member

  • Members
  • PipPipPip
  • 106 posts

Posted 06 May 2014 - 11:27 AM

I think laying a heightmap over a scanning of my drawing might be the way to go if that can be done...?


#20 Kablammo11

Kablammo11

    Obscure Person

  • Members
  • PipPipPip
  • 3,953 posts

Posted 06 May 2014 - 11:48 AM

You can do even more: You can scan your paper layout and turn it into a computer file. And that you then can place as a texture on top of your terrain. Just make it a square (Unity terrains are always square), and give it the same dimensions as your terrain. I always make a 2D layout in Photoshop and then put it on top of my terrain. Like this:


Obelisk_zps7beff4a4.jpg


In this case, the fairways, greens and rough you can see have been designed in Photoshop and then imported into Unity as the primary terrain texture. This way, I can basically project my sketches and doodles staright into the Unity project, and use them as the starting point of all my work.


This, for example, is the orginal layout of my Willow Heath project. 


WillowHeathLayout_zps93092cb9.jpg


As you can see, I added shot lines and landing areas for drives. And once you have such a basic layout, you can easily add a transparent Photoshop layer on top of your design to create your height map based on the layout, then import it into Unity as well - and the contours will match the elevation.


>>>>>>> Ka-Boom!


• Mulligan Municipal • Willow Heath • Pommeroy • Karen • Five Sisters • Xaxnax Borealis • Aroha • Prison Puttˆ

• The Upchuck   The Shogun  • Black Swan (•)


<<<<<


1 user(s) are reading this topic

0 members, 1 guests, 0 anonymous users