Jump to content


Photo

The Cheviot


  • Please log in to reply
51 replies to this topic

#21 Acrilix

Acrilix

    Advanced Member

  • Members
  • PipPipPip
  • 1,832 posts
  • LocationBedford, UK

Posted 16 November 2016 - 09:27 PM

Isn't the wall basically just a box shape that you repeat to make your walls?

If so, you just need to add the box collider to the prefab and size it to fit.  As Mike said, every time you copy/place a wall section it should then have the collider fixed to it, if it's attached to the original prefab.


life ................... don't talk to me about life ................

#22 nstone73

nstone73

    Advanced Member

  • Members
  • PipPipPip
  • 146 posts
  • LocationDenver CO

Posted 16 November 2016 - 09:36 PM

It is, yep....and I assume if I create the box collider on the first instance and then duplicate the object, the new object will also have the box collider. In this instance though, I'd already placed all my sections (with no box colliders). So I'm guessing I could set up the box collider on one section and duplicate that section and recreate my wall.....or just create one big long box collider on one existing section and leave the others without a collider. I see adding a box collider to an object in my hierarchy, but not on my project object....if that makes sense.


#23 DPRoberts

DPRoberts

    Advanced Member

  • Members
  • PipPipPip
  • 1,610 posts

Posted 16 November 2016 - 11:45 PM

It is, yep....and I assume if I create the box collider on the first instance and then duplicate the object, the new object will also have the box collider. In this instance though, I'd already placed all my sections (with no box colliders). So I'm guessing I could set up the box collider on one section and duplicate that section and recreate my wall.....or just create one big long box collider on one existing section and leave the others without a collider. I see adding a box collider to an object in my hierarchy, but not on my project object....if that makes sense.


I would highly recommend K11s advice on creating a proper prefab. It's the way to go for any object. That way you can go back and edit the original and have changes carry throughout. It is also friendlier with FPS I believe because they share a material as well. This saved me on a bulkhead when I realized I had a UV issue I wanted to correct. Fixed the mesh, reimported and didn't have to do any rebuilding of the wall. Your thoughts sound correct on starting with a small segment and setting that up correctly with a proper collider, create prefab and then building from duplicates of the prefab.

#24 nstone73

nstone73

    Advanced Member

  • Members
  • PipPipPip
  • 146 posts
  • LocationDenver CO

Posted 16 November 2016 - 11:58 PM

So, don't use a box collider? As Acriiix mentioned, the wall is made up of lots of faces. If I expand my prefab in the project window, there are multiple meshes, not the g0 that K11 mentioned. I don't have a single mesh to assign to the hierarchy object for the mesh collider. I can set the material to concrete, but I don't have a relevant single mesh to apply for the mesh value. If I "select mesh", I see all the different meshes that are under my prefab on the project window that look like individual meshes for the individual rocks that make up the wall. I want a mesh for the wall, not just one of the rocks?


#25 DPRoberts

DPRoberts

    Advanced Member

  • Members
  • PipPipPip
  • 1,610 posts

Posted 17 November 2016 - 01:44 AM

So, don't use a box collider? As Acriiix mentioned, the wall is made up of lots of faces. If I expand my prefab in the project window, there are multiple meshes, not the g0 that K11 mentioned. I don't have a single mesh to assign to the hierarchy object for the mesh collider. I can set the material to concrete, but I don't have a relevant single mesh to apply for the mesh value. If I "select mesh", I see all the different meshes that are under my prefab on the project window that look like individual meshes for the individual rocks that make up the wall. I want a mesh for the wall, not just one of the rocks?

Gotcha. Sorry if I added to confusion. So, I downloaded your wall from 3D warehouse to have a firsthand look. My intuition would be to open in a different program and combine the meshes. As a single mesh, you can then obviously create the single collider. There are ways to combine meshes in Unity but I am unfamiliar with that approach. This guys video explains one way. Unfortunately, the DAE file from Sketchup isn't playing nice with my Blender or I would do it for you. I will keep fiddling with it. Hopefully, someone with a bit more 3D know how will pitch in. I think this presents a great opportunity to learn how to build your own wall! Individual rocks on that wall will create way too many tris anyhow.


#26 nstone73

nstone73

    Advanced Member

  • Members
  • PipPipPip
  • 146 posts
  • LocationDenver CO

Posted 17 November 2016 - 02:11 AM

Cheers, much appreciated. As it's my first course and I'm on to the 17th, I think I'll save this for another day or project. I've only used that wall around that green and alongside the 5th tee box, so hopefully it won't have too much of an impact (they happen to be on opposite sides of the course).


It shouldn't come into play on the 4th/5th but if it causes a problem on 17, I'll replace it with the stock fence.


#27 mistajam

mistajam

    Advanced Member

  • Members
  • PipPipPip
  • 159 posts
  • LocationMunich

Posted 18 November 2016 - 05:30 PM

Lol i found, downloaded and used the same wall like you .... hahahha


on my course it comes into play right in front of one green ... so i used a box collider ... i still got 60 fps around the hole ... ;) and ball is bouncing of just like it should .... ahh and also added concrete as material so it plays the right sound when hit ... ;)


Collision_Box.jpg


  • nstone73 likes this

#28 nstone73

nstone73

    Advanced Member

  • Members
  • PipPipPip
  • 146 posts
  • LocationDenver CO

Posted 18 November 2016 - 10:33 PM

I have a full playable 18 holes...here's a few screenshots:

2nd tee...a 200 yard par 3. slightly uphill

f7f9f170b9.jpg

Downhill approach to the 4th, a 400 yard (from the Championship tees) par 4....5th tee the other side of the wall

f8013ae174.jpg

Second shot at the 9th, a 570 yard par 5....a 5 wood should get you to green if you hit a decent drive down the middle

f8091ef679.jpg


#29 nstone73

nstone73

    Advanced Member

  • Members
  • PipPipPip
  • 146 posts
  • LocationDenver CO

Posted 18 November 2016 - 10:48 PM

10th green, a downhill 250 yard par 3

f8153d35c1.jpg

17th green, an uphill par 5 that can play 600 yards (large green)

f82778d45a.jpg

Finally, the 18th that runs the other side of the lake to the 9th (with a shared green)....450 yards....elevated tee, pretty flat second

f833c6320c.jpgf8368719fe.jpg

To do:

- more planting around the holes, mainly grasses

- planting of trees in dead areas around the course

- course boundary

- outer plot

- clubhouse area (maybe some more 3d stuff, like planters etc) with maybe a putting green

- more easy/medium/difficult pins (have the minimum 1 of each per hole)

- yardage markers...I want to add at least 150 yard marks, hopefully 100 and 200 yard ones too.

Any thing else? Probably more tweaking and over-tweaking until I overdo it and spoil it.


  • luetze and mistajam like this

#30 Mike Jones

Mike Jones

    Advanced Member

  • Administrators
  • 6,159 posts

Posted 18 November 2016 - 11:04 PM

Probably at this point, back up the entire project folder.


#31 nstone73

nstone73

    Advanced Member

  • Members
  • PipPipPip
  • 146 posts
  • LocationDenver CO

Posted 18 November 2016 - 11:13 PM

Probably at this point, back up the entire project folder.

Done....just took a copy of the entire Unity folder for that project and renamed it something relevant ('Cheviot_backup' instead of 'PP_test_4 - Copy')


#32 DPRoberts

DPRoberts

    Advanced Member

  • Members
  • PipPipPip
  • 1,610 posts

Posted 18 November 2016 - 11:19 PM

Looks great. That par 5 is just the right amount of risk reward. Trees right can falter a poor layup as well. Look forward to testing it out.

#33 nstone73

nstone73

    Advanced Member

  • Members
  • PipPipPip
  • 146 posts
  • LocationDenver CO

Posted 19 November 2016 - 06:44 PM

Raised the outer terrain around the course, and with copious amounts of smoothing, it looks pretty decent in the game.

09c16ae857.jpg

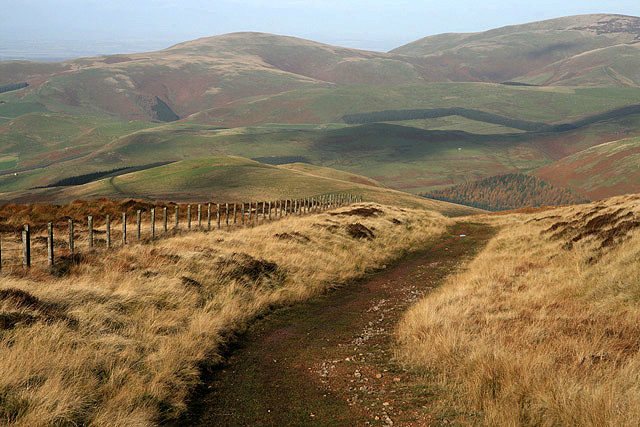
Now I need to paint some textures to make it look something like this.....gulp...

1049372_a83ca512.jpg


#34 nstone73

nstone73

    Advanced Member

  • Members
  • PipPipPip
  • 146 posts
  • LocationDenver CO

Posted 23 November 2016 - 03:21 AM

No, someone hasn't dropped a variety of Frisbees (is that the plural?) on the course....it's my attempt at making some yardage markers for the fairways...100, 150 & 200 yards. With some of the cylinder buried underground, I could use these for tee boxes too.

50970a8cca.jpg

Compared with trying to make these, Unity and CF are a piece of cake (that might have something to do with me actually watching the CF tutorials Mike posted). I've certainly found the non-course pieces a lot slower than creating the 18 holes.


  • DPRoberts likes this

#35 Drgnslyr221

Drgnslyr221

    Advanced Member

  • Validating
  • PipPipPip
  • 721 posts
  • LocationLakewood, CO

Posted 23 November 2016 - 03:56 AM

Looking pretty good. I was actually pretty surprised how easy the designing aspect is on CF. It's really quirky though.


#36 nstone73

nstone73

    Advanced Member

  • Members
  • PipPipPip
  • 146 posts
  • LocationDenver CO

Posted 24 November 2016 - 10:25 PM

Ok...it looks like it's my turn to lose a course. This morning I downloaded a bunch of textures and added them to Unity. I painted with a couple of textures and decided to add the rest. The next time I painted with a texture, Unity froze and crashed (activating the crash report/bug log interface).


With my fingers crossed, I re-opened my project and everything seemed ok, fair enough the last textures I'd added were no longer there, but the original couple I'd added and painted with were. Did a build, the course was fine and playable....no issues it seems.


At this point, I left my project open in Unity....as usual. Came back to Unity and tried to turn on CourseForge from the Perfect Parallel menu....nothing happened. Quit Unity and reopened the project. Again, nothing happens when I try to turn on CourseForge. Quit Unity again.


Created a new project, imported the CF package. So, I have a new project....closed Unity again.


Rebooted my machine.


Reopened the my original project....now almost everything in the project hierarchy had disappeared. Noticed it was displaying the original, old scene, so opened my most current one. Phew...at least that seemed to get all the objects placed back.


However, CF still won't open for me. My terrain is still there, at 0,0,0...I can still do Unity things....paint textures, trees, manipulate terrain.


Any ideas on why CF won't open? I tried backing up my terrain too, and although the file selection window opens, no new terrain is generated.


I removed (well, moved) the textures I'd added and reopened Unity, but still no joy (patches of white where those textures had been painted).


​Ok....randomly trying things, I went to the game window in Unity (instead of scene) and hit "Play"....flew around a bit....then back to my scene window. Opening CF now seems to works. It seems if I have "Play" hit (and Pause) then I can turn CF on.


However, the build button is greyed out and back up terrain still doesn't seem to do anything. I can get into the mode to place a spline, but I can't place one. I can select the ruler, but can't place a new measure. The buttons to turn on/off the CF messes and splines seem to work ok.


I don't need to have play selected on my new project.


Edited by nstone73, 24 November 2016 - 11:44 PM.


#37 nstone73

nstone73

    Advanced Member

  • Members
  • PipPipPip
  • 146 posts
  • LocationDenver CO

Posted 25 November 2016 - 12:10 AM

Obviously I have my backup...so at the moment, I'm basically back to where I was when I finished the playable part of my course.


Things I'll have to redo:

Outer terrain sculpting

Outer terrain painting (wasn't very far along with this and I wasn't that taken with my results)

Clubhouse area and putting green

Yardage markers


I'll backup more often.


#38 Crow357

Crow357

    Advanced Member

  • Administrators
  • 4,670 posts

Posted 25 November 2016 - 12:57 AM

I would reimport CF into the project.


Win 10, i7-7700 @4.2 ghz, 16GB DDR4, EVGA GTX 1080
Swing Type: Tour Pro Wireless XBox 360 Controller.

#39 nstone73

nstone73

    Advanced Member

  • Members
  • PipPipPip
  • 146 posts
  • LocationDenver CO

Posted 25 November 2016 - 01:21 AM

Thanks for the suggestion, but if I import the CF package again, Unity is pretty clever, the only thing that shows up to import is the terrain. If I import that (which I did on a copy of my project) I just get the original terrain back. CF still doesn't open.


#40 Crow357

Crow357

    Advanced Member

  • Administrators
  • 4,670 posts

Posted 25 November 2016 - 03:04 AM

Thanks for the suggestion, but if I import the CF package again, Unity is pretty clever, the only thing that shows up to import is the terrain. If I import that (which I did on a copy of my project) I just get the original terrain back. CF still doesn't open.

Sorry.  I left out a step.  Delete the Perfect Parallel folder from your Project window first.  Make sure your scene file is saved out first, then the import should reload all the stuff.


Win 10, i7-7700 @4.2 ghz, 16GB DDR4, EVGA GTX 1080
Swing Type: Tour Pro Wireless XBox 360 Controller.


0 user(s) are reading this topic

0 members, 0 guests, 0 anonymous users