Always glad to be of service, Andy.
End of year treat coming right up. (That's actually the long version of my answer to Olazabol's lowres post. Here's a brief overview of some very basic key features of 3D objects. More seasoned readers, please look away, this is very, laughably, painfully basic.
Every 3D object is defined by two distinct components that combine with each other: By its mesh and by its texture.
The MESH defines the geometry of an object, its shape. Think of it as a grid in three dimensions, made out of vertexes (points in 3D space), and lines, connecting the vertexes.
The mesh is the spacial model of an object. It is also called a wireframe, sometimes.
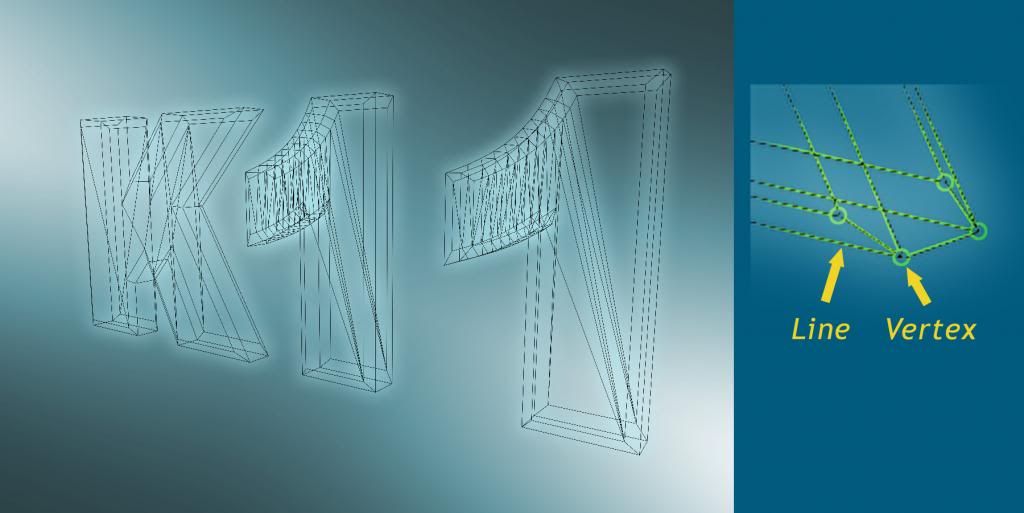
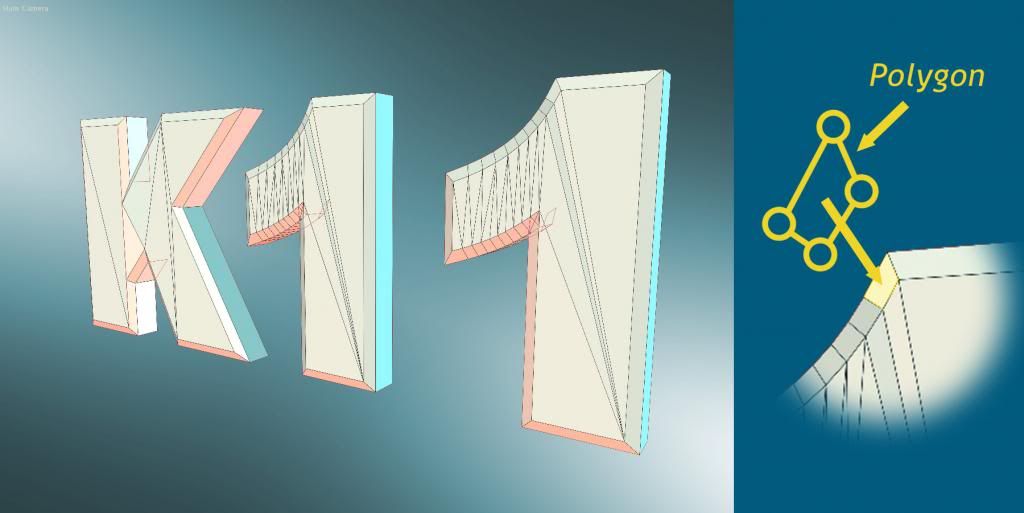
When the vertices and lines of a wireframe enclose a flat, 2D space, this space is called a polygon. This basic polygon is like a blank wall tile at the moment. And that's all for the mesh, really: Vertexes and lines define polygons which in return add up to a 3D shape. A rather boringly colored, unnatural-looking shape...
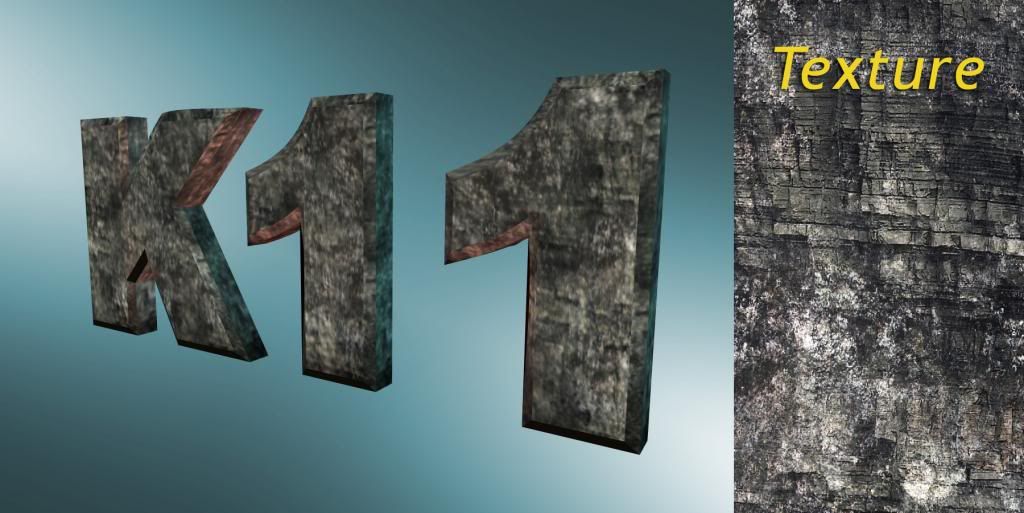
Now the TEXTURE comes into play. The texture basically is a 2D image that is being wrapped over the 3D mesh. Think of a strip of wallpaper that you need to paste onto a blank, round, curved wall of polygons(electronically).
But there is a problem: The computer doesn't know which bit of the texture goes on which bit of the wireframe….
So will need to tell him that - how depends on the software that is involved - assign the texture to a mesh, choose from different spacial projections like spherical, radial, cylindrical etc and generally have to fiddle a bit and fuss about to stick your flat, 2D texture image to a spacial object.
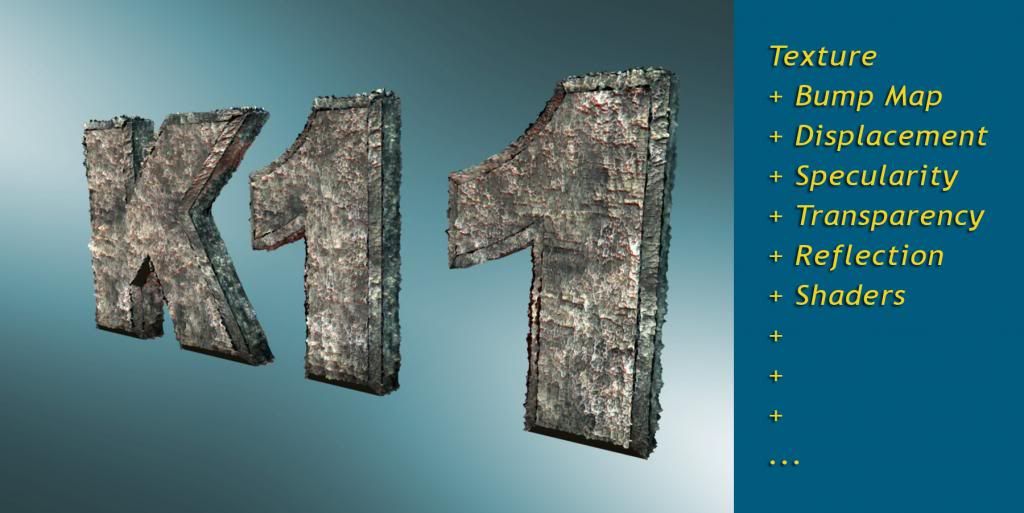
Once you've done that, you're not done yet. The texture still looks flattish, bland and rather fake. Even on the 3D object, it looks a bit too much 2D. It could work okay, mind you, from a distance. But up close it needs a bit more oomph So you might want to add a second layer to your texture, a second 2D image which gets filtered on top of the base texture. Like a bump map (Unity calls it a normal map), an extra layer that works like a height map, assigning high and low spots to your texture. If you do that, the result starts looking a bit more realistic.

And there is so much more you could do with textures: Extra layers with various effects, extra shaders (special effects helpers) that could add fur or hair, crazy stuff, advanced stuff, complicated and sophisticated stuff we'd rather not bother with. I'm clueless about most of it...
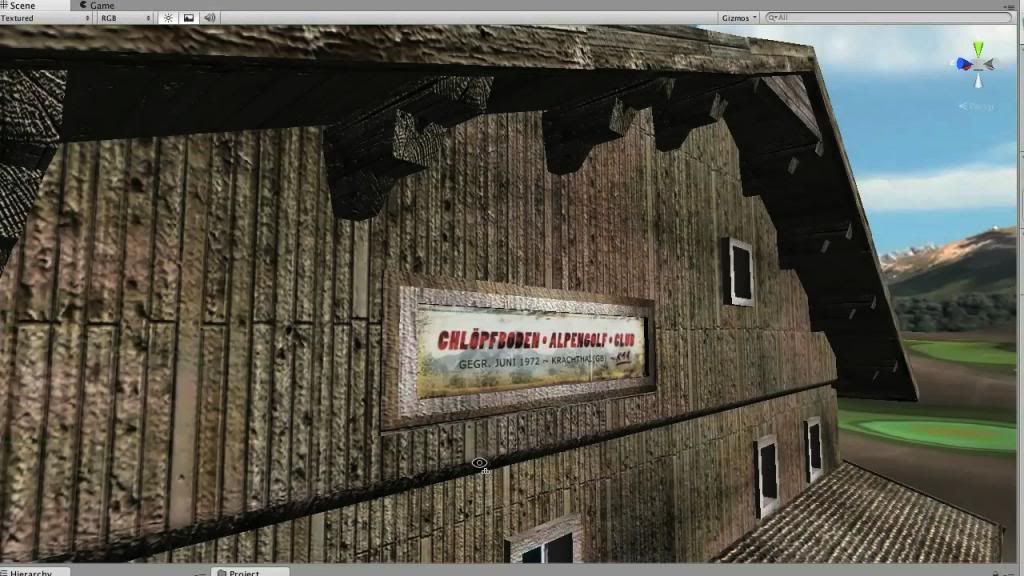
To stay basic: I recently built this Alpine Clubhouse, from scratch, with self-made textures:
Here are the two images I used a while ago to texturize it. I called them "Polytext", because I assembled, into one file, all the materials needed for stone walls, roof tiles, wall planks, windows and doors. Just look at the links, you'll understand.
Polytexture (click to see)
Polytexture Bump (click to see)
The result did turn out okay, I went a bit heavy on the bumpiness of my bump map, but I can adjust the bumpiness within Unity, so no harm done.
Well, my life just got one hour shorter, doing this. Hope you can take something out of it.
Happy New Year Everybody!


